Don't miss your chance to invest in 'Fabiola'!
Visit our crowd-funding page to help make Catholic movies!
- Home
- Movie Making Course
- How To Build A Set And Costume Actors
Phase 8: Get Ready To Learn How To Build A Set As Simply As Possible And How To Make Sure You Love The Costumes By Doing A Costume Fitting
In Phase 8 you will learn how to build a set that you can easily work in.
In addition to set building you are also going to learn the simplest way to fit all your actors for costumes to make sure you love them!
Phase 8 contains 4 tasks:
This is where the real manual labor comes into moviemaking. So...you might want to invite a few teenage boys to help with set building. Just make sure that they are reliable enough to still make it look good!
Task 1: Design The Set On A Piece Of Paper And Purchase What You Need
You've already seen the film with your imagination. Now it's time to harness your imagination to a budget and see what you can do for your sets.
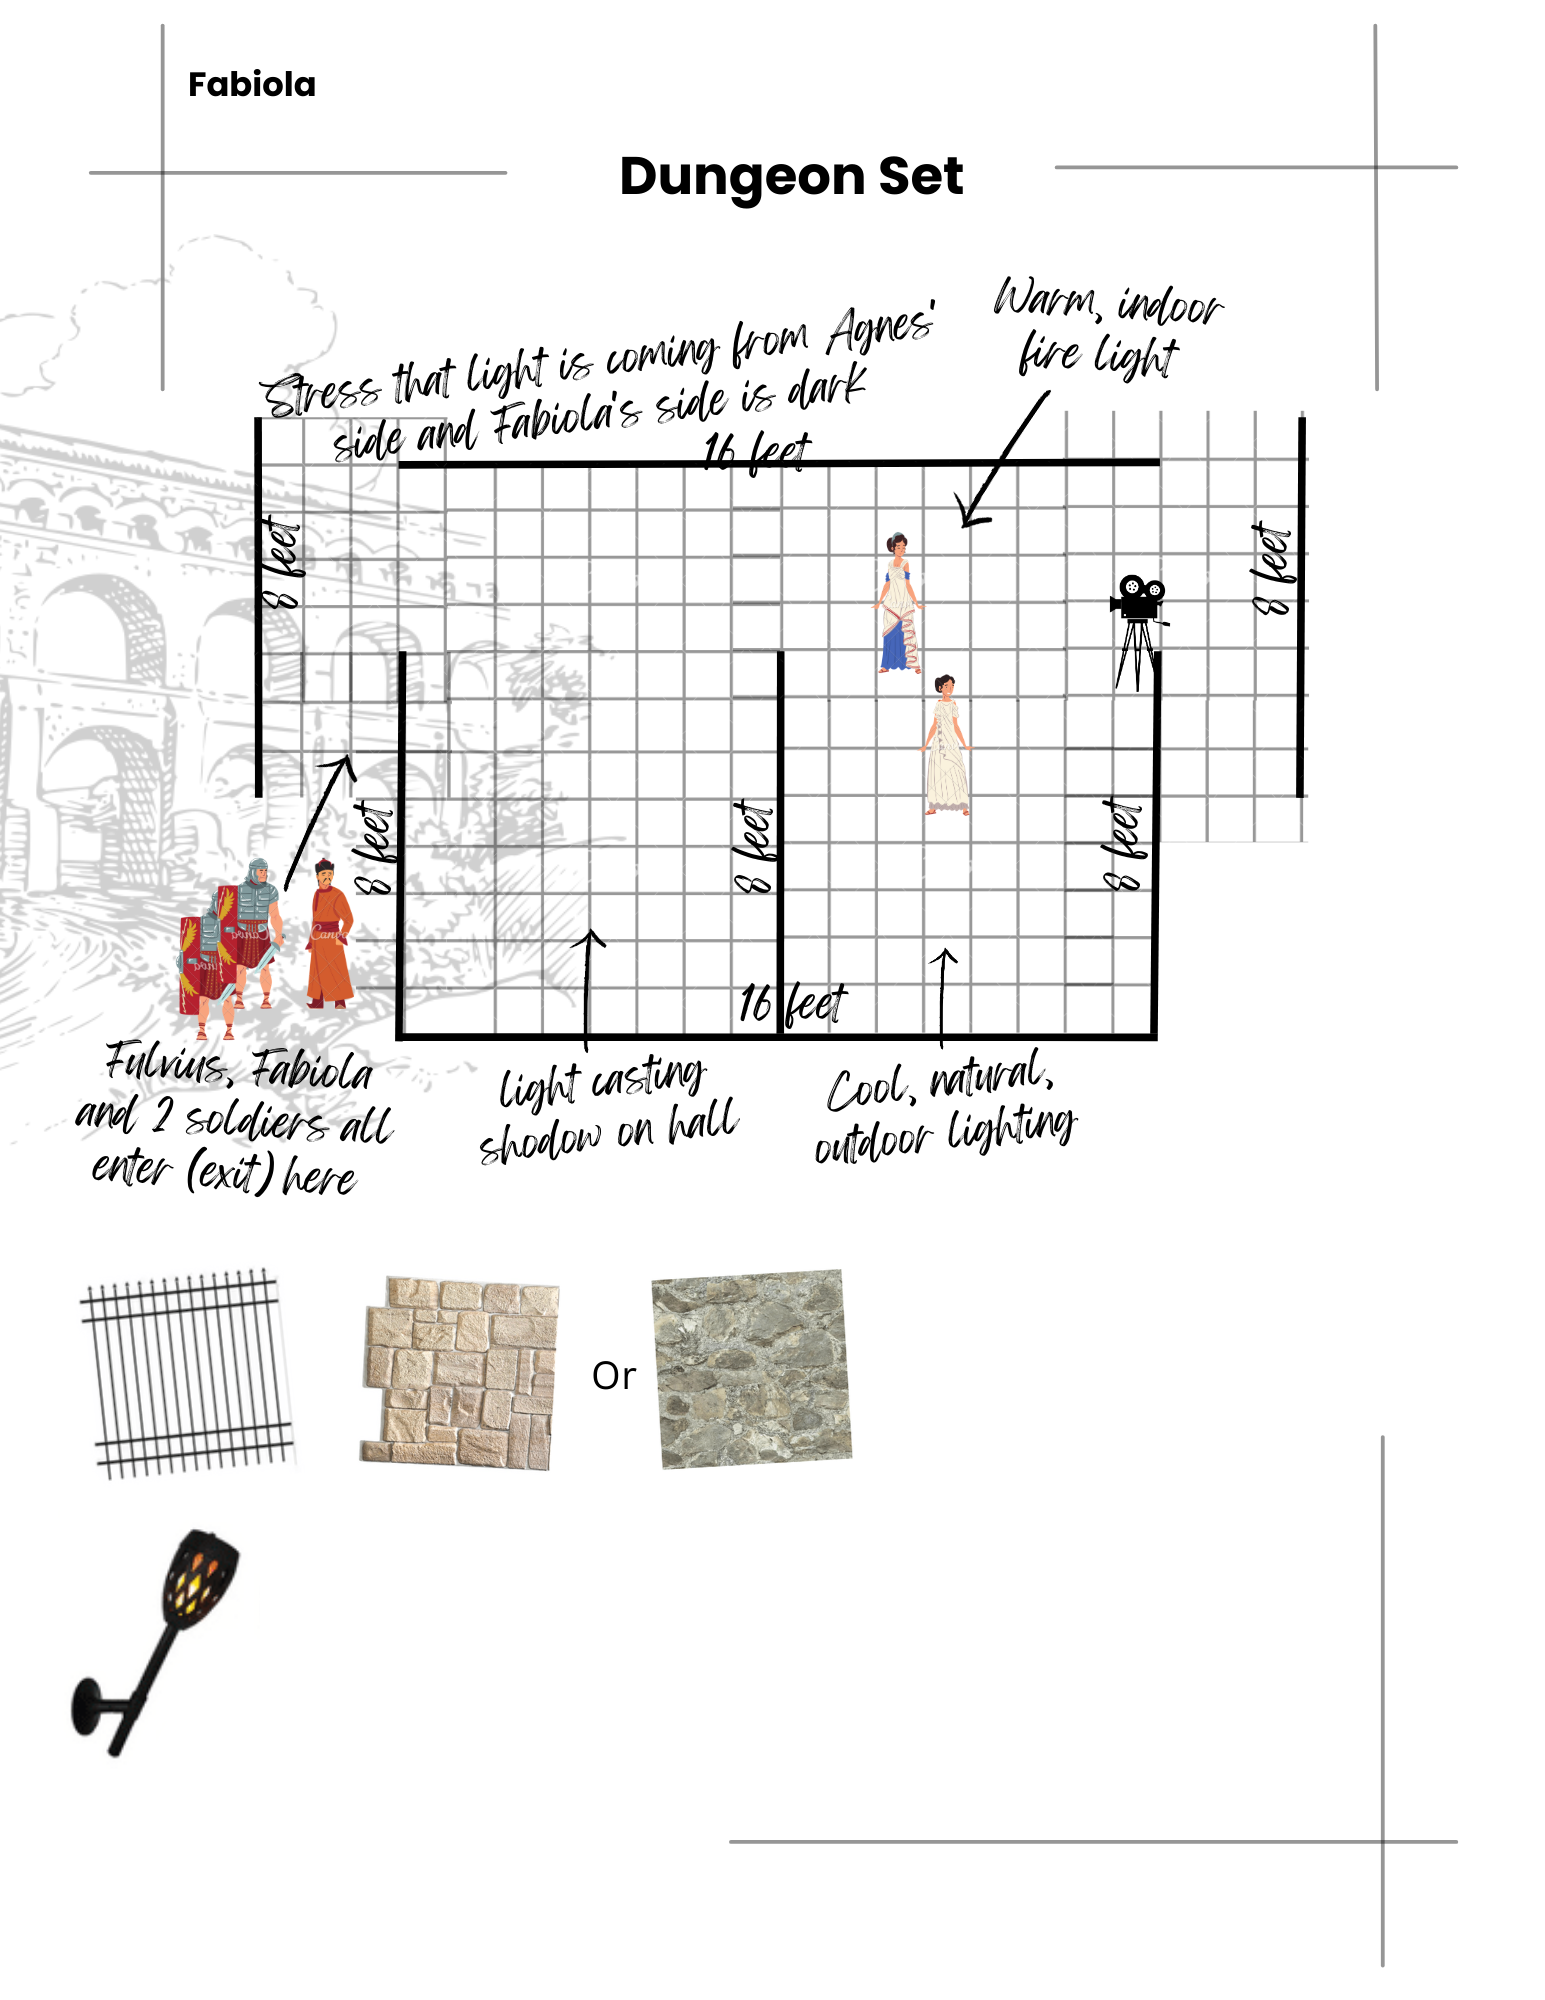
Get pencil and paper out and draw what you want your set to look like. It doesn't need to be perfect yet, just get it on paper.
Take a look.
- Do you like it?
- Is there anything about it you would change?
- Does it contain all the exits and entrances mentioned in the script?
- Did you include what the walls should look like and include anything they might need (pictures, stone texture, wall sconces)?
- Does the set design accommodate your camera and lights?
Now really draw the set, incorporating any changes you might want to make. Color it with permanent markers, make it into a small model (we did this with the Earl's Room in Outlaws of Ravenhurst), or draw it on a computer.
Now, go over to your budget and see how much you budgeted for each set. Look at what you want and decide what you need according to your budget. If the majority of your scenes take place in this set, make sure it's not going to look too hokey.
Don't forget to think about what you have available to you for your sets. Already have curtains that you know will work perfectly (or be good enough)? Is there a nearby castle you can borrow?
Once you know what you'll be needing, purchase the items. Purchase everything at once. This makes it so that you get everything you need because otherwise you might accidentally spend the money you need to complete your sets on make-up, gaffer's tape or something else you are going to need all throughout production.
By getting everything you need now, you save yourself a lot of painfully cheesy looking sets later.
Task #1 Checklist:
1. Design your set being imaginative but keeping in the constraints of your budget.
2. Buy your set pieces all at once.
Task 2: Purchase Your Dream Costumes
You already budgeted and dreamed about the costumes you would like to use for your film.
Now it's time to see what you can afford with the budget you are working with.
Much like you did with sets, negotiate with your budget to get something that is great, but not too expensive to squeeze into your budget.
You are really going to want to be sure that your main cast have costumes that don't look tacky.
Since you've already casted, you can now go ahead and purchase your costumes. Once again, just be sure to stay within the bounds of your costume budget.
If you are working with a smaller budget, remember that making costumes is usually an option (considering your time constraints, of course).
Task #2 Checklist:
1. Look at your costume budget and finish your costume planning.
2. Purchase your costumes.
Task 3: Get Hands-On And Learn How To Build A Set!
The thing you need to think about first when you are ready to build your set is what kind of a set you are going to be building.
The three main sets that you will most likely be making are:
- Decorating a room to look like your movie
- Building a free standing set
- Scouting out locations for a set
Let's get to it!
How To Build A Set By Decorating A Room To Look Like Your Movie
This is perhaps the easiest and yet the hardest set to make.
The reason it is the easiest (as well as the cheapest) is because there is not any construction that needs to happen.
It's the hardest to use because, in most cases, you can't leave it up if you intend to use it for multiple scenes over the course of a few days.
There is a lot of setting up and tearing down.
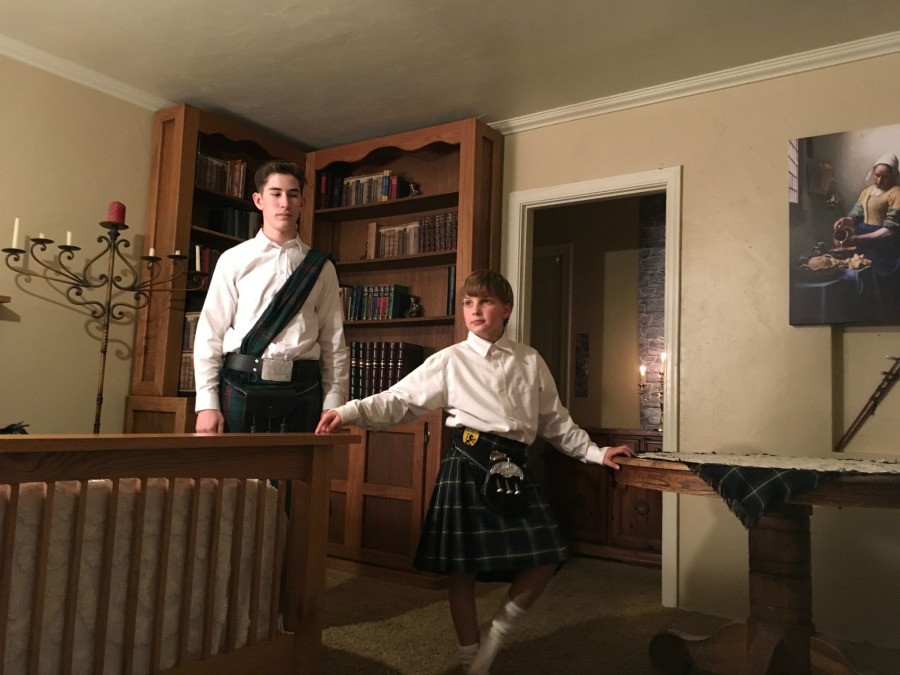
As you can see in this picture of the Earl's room from Outlaws of Ravenhurst, we completely rearranged the furniture and even brought a bed into our living room for this set. Although we did leave it up a few times, usually we were setting it up, shooting, and tearing it down all in the same day.
All that aside, let's talk about actually learning how to build a set of this nature. First of all, consider what you want your end set to look like.
There are going to be several truths about a room you just can't change such as size, chandeliers, wall texture, and window placement.
For the Earl's room, we already had book cases which would have been very difficult to move.
To compromise with this reality, we left the book cases and cleared out any books that didn't look period-appropriate. We also wrapped certain sections of books with "vintage book" wallpaper.
This wallpaper set piece came in handy many times and was an easy fix for out-of-place items on the book case. In fact, if you look closely at the picture, you can see three spots of this wallpaper around Godfrey's head.
Another thing to consider when working in a modern room for a set is light switches and power outlets. It is best to get these covered when you put the set together as opposed to trying to block them with an actor's head during shooting.
Speaking of wallpaper, stone wallpaper can get you out of a pinch in many cases when you are making a medieval film. Just throw a piece up and your set already feels more like a castle.
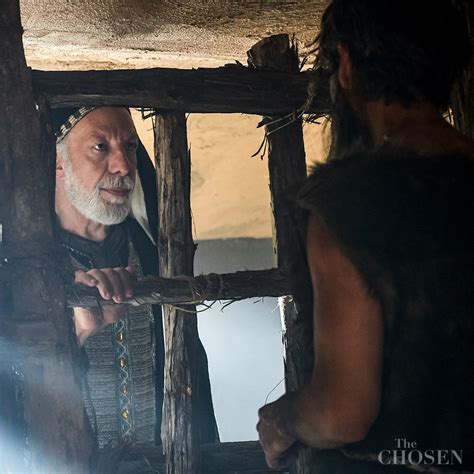 In this example, the bars of the prison and the other actor are being used as set texture.
Bring in any pieces of furniture you have bought or gathered to give your set the right feel.
Don't forget to also add any props that will give the room depth and added texture.
Of course, this last tip will apply to all set kinds.
Most Hollywood films have an object in front of the actor every few shots.
Provide yourself with this kind of "texture" now while you are building the set to avoid scrambling for something on shoot day.
For medieval films this could be hanging herbs, a bouquet on the table or a candelabra. More ancient time films benefit from beads or veils hanging from the ceiling.
Even beams of light or extras can be used for set texture. These objects make your shots interesting and help viewers feel like they are in the room with the characters.
How To Build A Set Using The Free-Standing Model
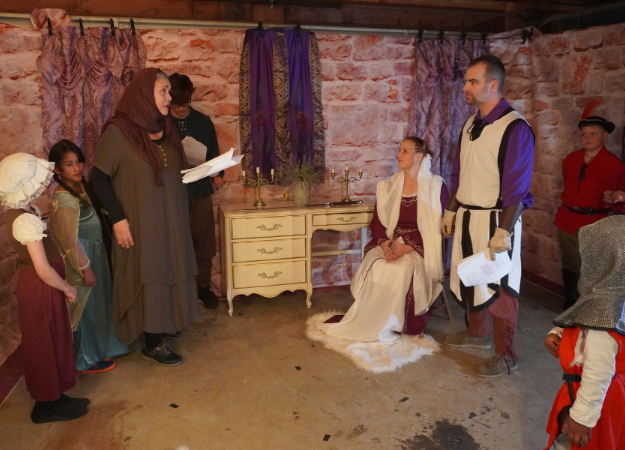
Free-standing sets allow you to have complete control over the set.
On the other side of the coin, building a set of this kind has challenges of its own.
Let's start by talking about how to build a set using a free-standing method.
In the image on the right, you can see that this set, which we built in our garage, is a series of green screen stands with textured backdrops hanging from it.
Here's a cheater picture of how it's built and a little bit of a promise on how flexible you will be with your shots:
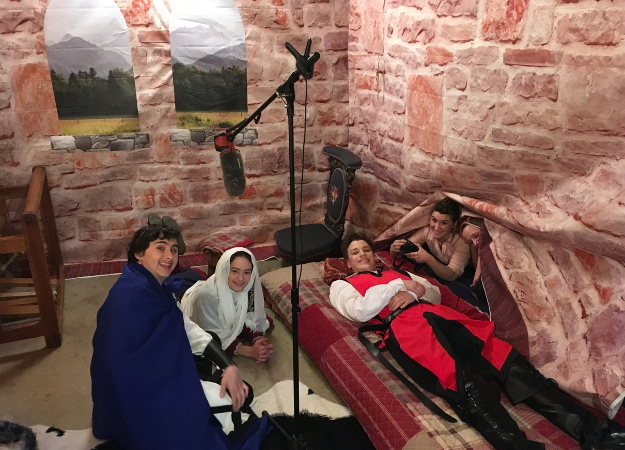
To build, you are going to need at least three stands. We have always used green screen stands and you can easily find backdrops that have stone, solids and even room sets on them.
As far as the stand goes, you want a stand that is substantially taller than your tallest actor. Some get as high as 9 feet. That should be high enough!
Be sure to get the props and set pieces that you need to make your set look authentic.
Here's a list of some of the challenges:
- Your shots may be restricted by only having three walls.
- Sometimes the walls ripple from someone walking by them. This, of course, ruins the entire effect!
Scouting Out Locations For Sets
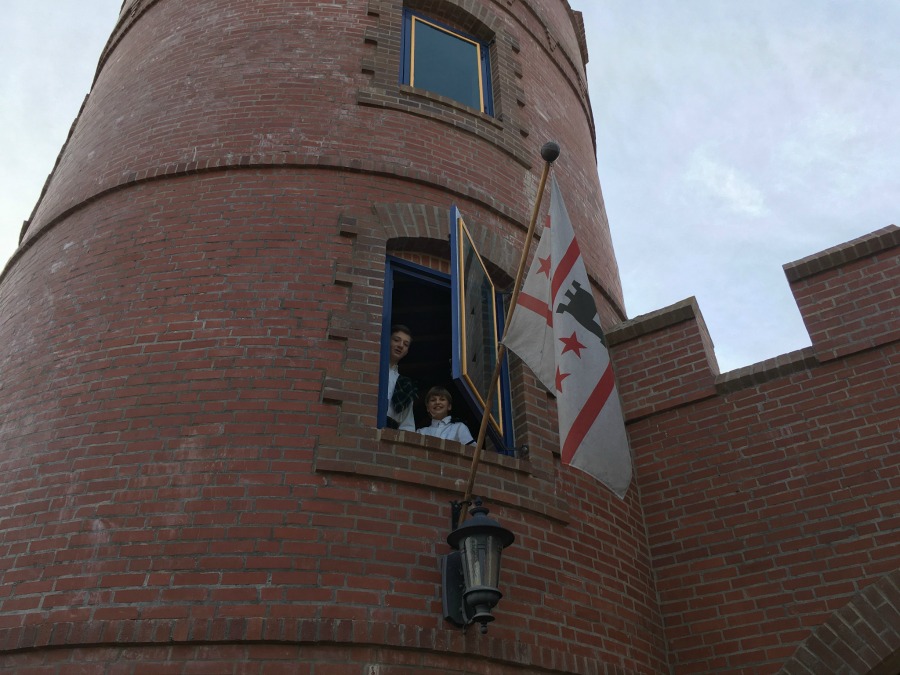
Scouting out good locations makes your shoot day go very smoothly.
There isn't anything out of place such as light switches or modern decorations.
In the picture on the right, a pair of actors look out of the window at Kasteel Noz.
This set was definitely one of our favorites and it needed minimal set decorations and was a huge budget saver when it came to sets.
Outdoor sets are another set kind that you are going to have to scout for. Public land usually can be used as long as you make sure that you make way for other people enjoying the land. Which can be a challenge.
Another thing that you need to be really careful about with outdoor sets is modern structures. If your film is set before there was such thing as power poles or modern houses, their appearance in your film really takes away from the overall affect. You want people to feel transported to the era of your film and modern things take viewers out of the narrative.
To build...wait! There's no building necessary besides throwing a few of your props onto the set to make it have just the right look! Once again be sure to have something that will add texture to your shots.
So that brings us to the Task 3 Checklist:
Task #3 Checklist:
Think about what you can use for your set considering:
1. Decorating a room for your set.
2. Building a free-standing set.
3. Scouting out a location for your set.
For all of these models, remember to make sure you have considered props to make the set fit your movie and texture items like beads, herbs, and prison bars.
Task 4: Costume Fittings
For the most part (especially if you were careful getting everyone's sizes at auditions), costume fittings should go pretty smoothly and mostly be a hype-builder for your actors and serve as your pre-filming party.
So party!
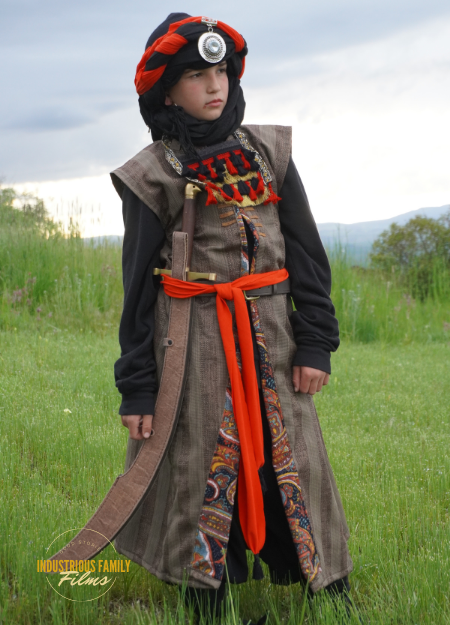
Just the same, plan to have your fittings two weeks before your first shoot. This allows you time to hem or take seams in if necessary.
Have refreshments planned (if this overwhelms you, just skip it) and plan to have a good time.
Have all your costumes prepared along with any accessories such as belts, head wear, armor pieces and jewelry.
Don't be too fussy when it comes to how well the costumes fit. As long as they aren't dragging on the floor or bursting at the seams, they will be fine.
The main focus of your fitting should be making sure all the pieces for a specific character are together.
Hosting a fitting also helps your actors take ownership over their costumes. It's easier for an actor to see his costume separate from a shoot day and think, "Okay, this is my costume," and be sure to find it and get it on when the shoot day arrives.
Once an actor is fitted, take a quick picture and get everything back on a hanger with the actor's name and character on it.
Do this for every character.
If you need specific actors to get things on their own to bring to shoot days such as black dress shoes or a white button-up, now is the time to make sure they know that they need to bring those things every time.
Task #4 Checklist:
Host a fun costume fitting and be sure to:
1. Get the costumes all together.
2. Take a picture with your actor in the costume and make a note of any adjustments you need to make to the costume.
3. Get everything back on a hanger with the actor's and character's name on it.
This brings an end to this lesson on how to build a set and get costumes on your actors.
Congratulations! You are now officially ready to move on to the production stages of moviemaking! Take a moment to think of all that you've accomplished so far. Preproduction is a lot of work and you should be proud of yourself! Now it's time to move onto Phase 9:
Let's Set It Up!
Did I miss something on this phase? Do you have any more questions about your current set design, our current set design, sets in general? Please leave it below. I'd be happy to help you with them!
